Wow. That is just about all I can think after hosting our Dinosaur Party last week! It was one of our largest programs I have ever prepped for. We organized our summer reading program differently this year, and I planned our large family programs (like the Dinosaur Party) to run twice, once on Monday evening and again on Tuesday mornings. That way, we are able to offer our large programs to families who need to come in during the evenings, and for families where it works better to come in during the morning. And, because it was the same program, I only had one prep, set-up, and clean-up for two huge programs! What a labor saver!
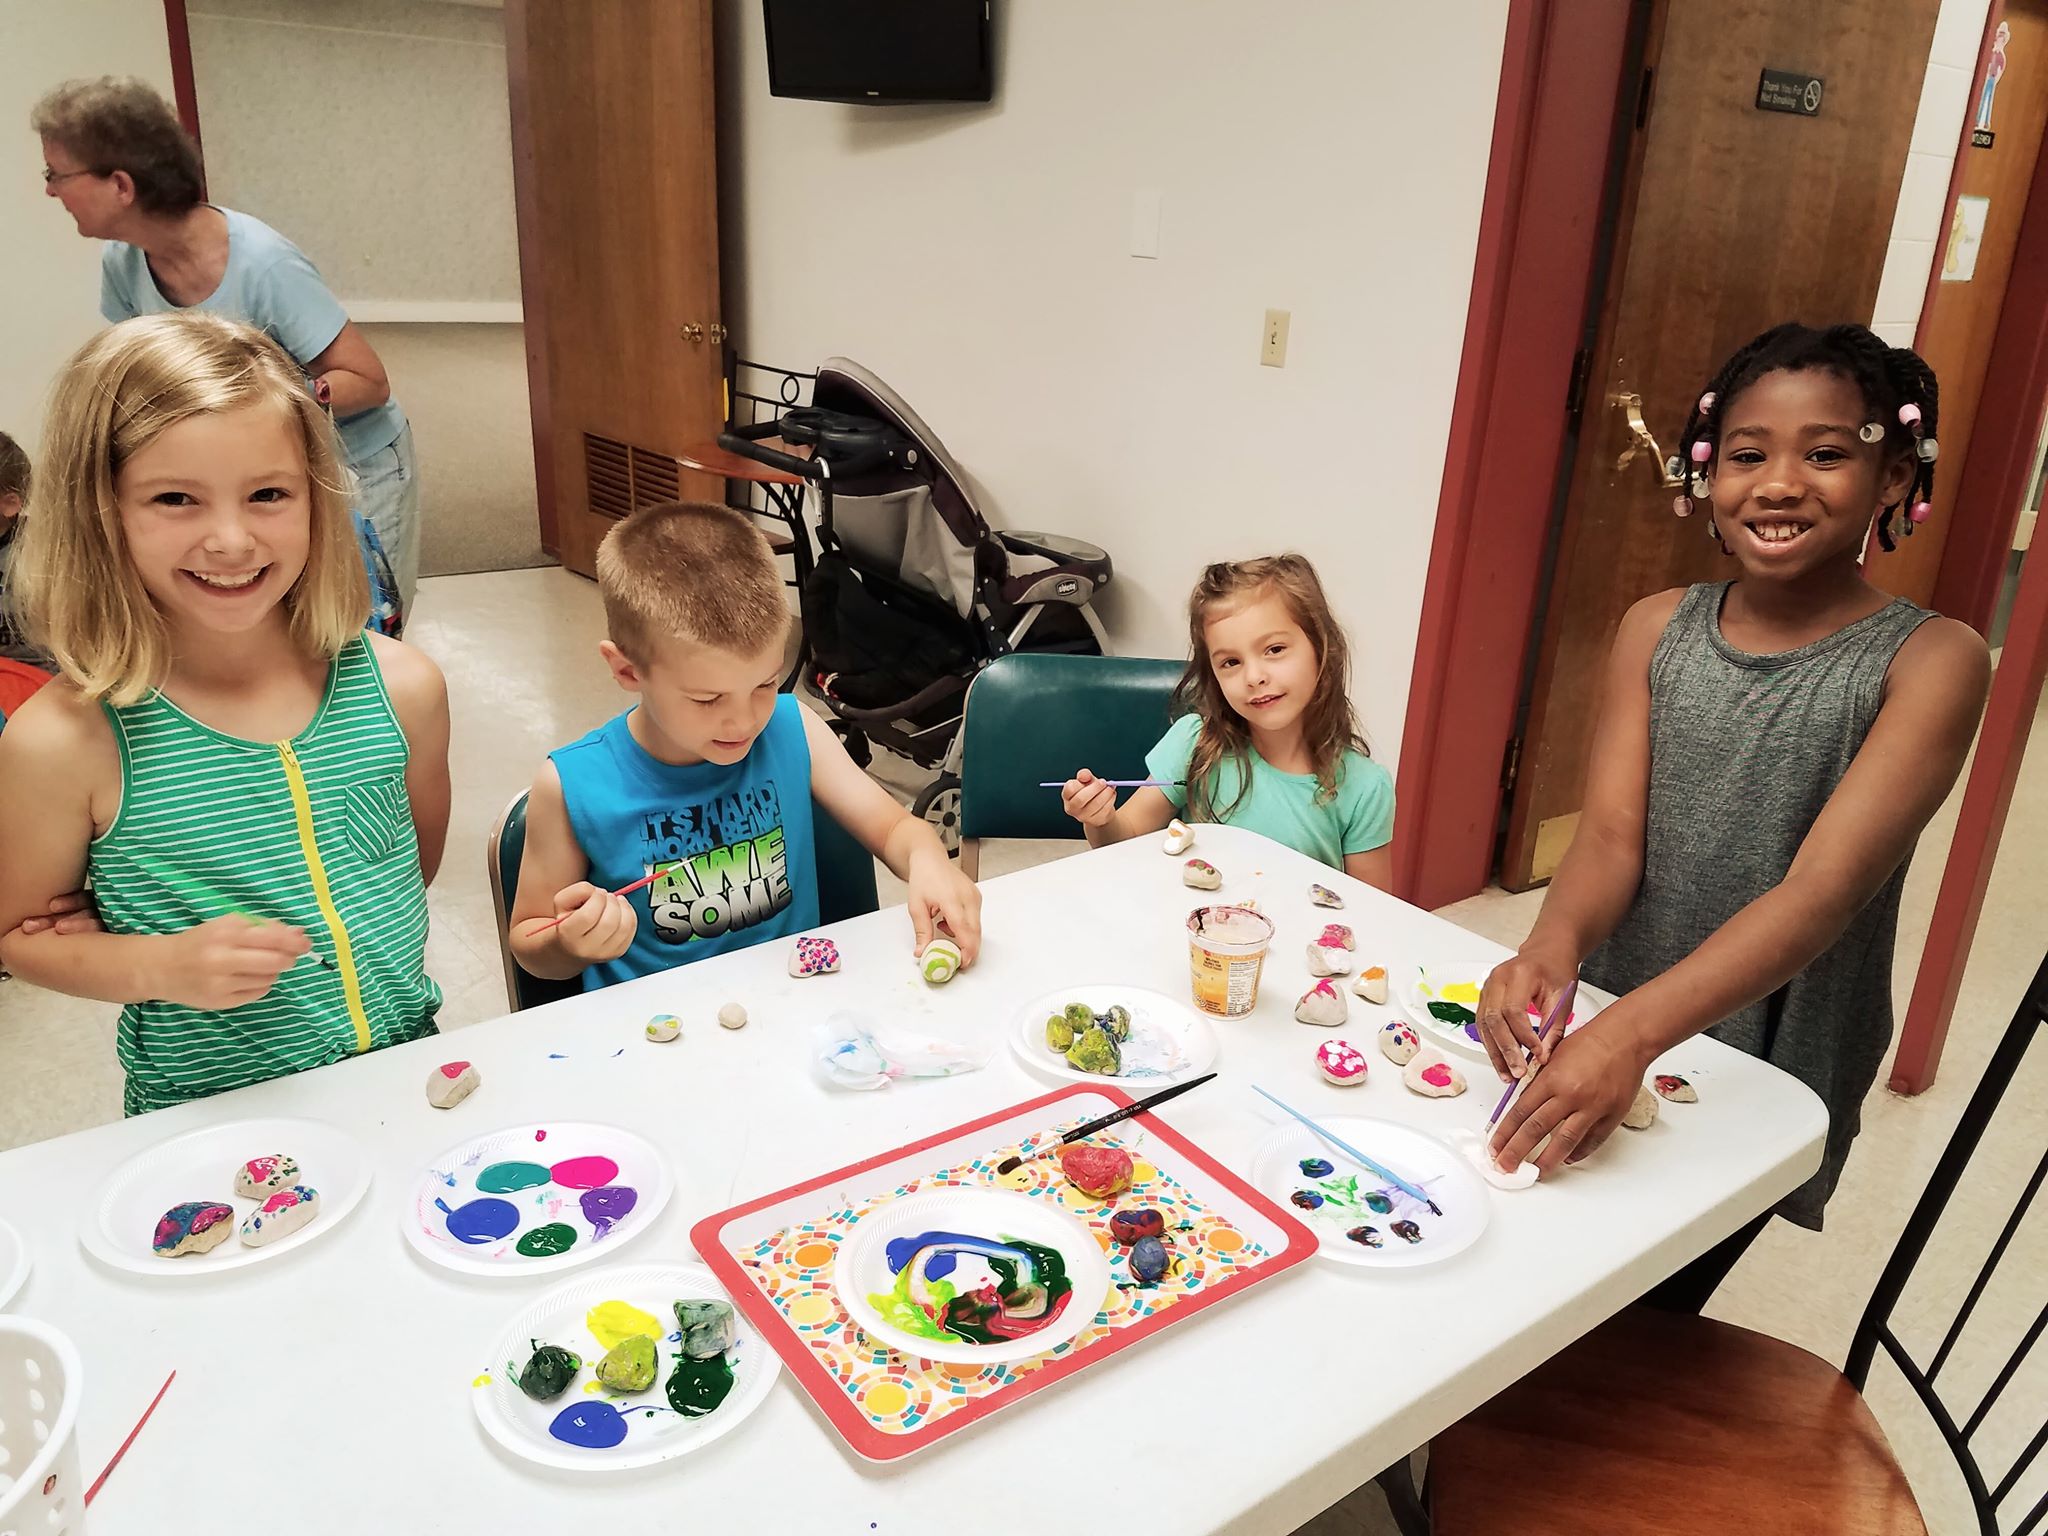
I planned this out so that we had five activity stations. We had 11 tween/teen volunteers come to lead all the activity stations. That is them up above. 🙂 This is probably the most expensive program I have hosted so far this year, but even so, I would estimate I paid about $80 for everything we needed and the supplies served almost 200 people between both days!
The skinny: Our dinosaur party had a short introduction to bring the group together. This was basically me talking to the kids about dinosaurs, asking the kids to roar, and reading them Dinosaur Roar by Paul and Henrietta Stickland. I had other books to read just in case, including Saturday Night at the Dinosaur Stomp by Carol Diggory Shields but the kids were antsy to begin on the activity stations they saw as they came in. Another great idea is to sing “We are the Dinosaurs” by Laurie Berkner! But, we did one story, and then got right to business! The crowd broke out into five activity stations. Volunteers manned each station which included making a dinosaur action figure, hatching dinosaur eggs, dinosaur tooth necklaces, dinosaur etchings, and finally a dinosaur fossil dig!

Cost: Again, about $80. Here is what I needed to purchase:
- $40 (Four under bed storage containers from Walmart)
- $8 (1 pound of Critic Acid for the Dino Eggs from Amazon)
- $14 (100 mini dinosaur figures from Amazon)
- $9 (Green cardstock paper for the Dinosaur Toy activity from Amazon)
- $8 (rubbing plates for the Dinosaur Etching activity from Amazon)
- $10 (10’x10′ tarp from Walmart)
And here is what I already had:
- Flour, and oil for the salt dough dinosaur tooth necklaces and dinosaur bones
- Plain white copy paper for the Dinosaur Etchings
- Red and White pony beads for the dinosaur necklaces
- Baking soda and oil for the dinosaur eggs
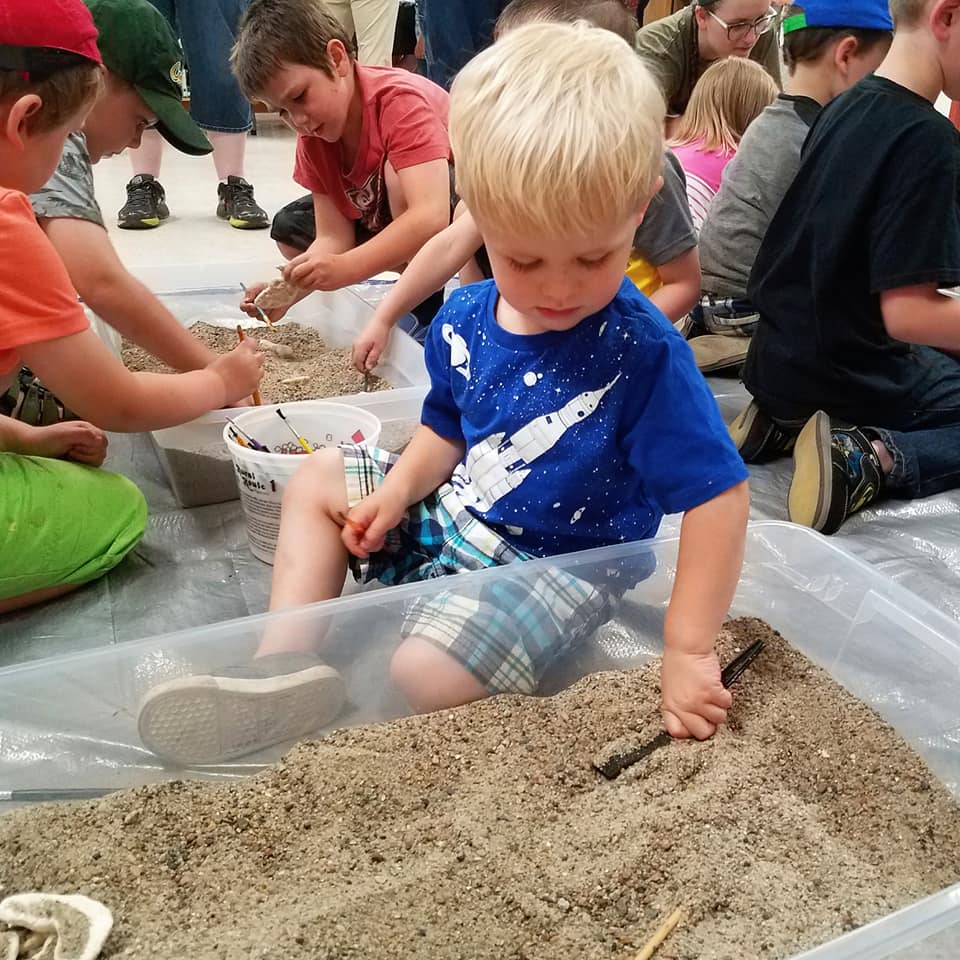
Set-up: I put a large tarp in the middle of the floor (I think our tarp was 10’X10’. This is where kid sat when to begin the program. After the introduction time, we moved under bed storage containers of sand with buried dinosaur fossils onto this tarp. We had no sand mess. The tarp captured everything. Our janitor did not even know what we did the next day when he mopped the floor! I had the other four activity stations set up around the perimeter of the room. Also, I had the soundtrack to Jurassic Park playing on my CD player throughout the event, which helped set a great atmosphere.

A daycare donated dinosaur plastic decorations, so we taped those to the wall. I also made some fun signs using copyright free dinosaur images saying things like, “Dinosaur Crossing”, “T-Rex Zone”, and “Raptor Speed 40 MPH”. We printed these out and also hung them on the wall. Here are my Dinosaur Signs.

Activity Stations:
Dinosaur Toy:

We made Glue-lee Printable Dinosaur from Krokotak. This is basically a dinosaur action figure that requires no glue or complicated assembly. So simple, even for younger kids! Kids just cut along the solid black lines, and fold along the single dotted line. They loved it. I copied the image template from their website and was able to resize it so that I could print two dinosaur templates on a standard 8.5”x11” piece of green cardstock.

Dinosaur Eggs

I bought a pack of 100 miniature dinosaurs from Amazon for $14 to “fill” the eggs. To make the eggs, I used the recipe from Fun at Home with Kids. Basically, you mix ½ a cup of baking soda in a small dish pan and add 2 Tablespoons of citric acid. Finally, add 1 teaspoon of oil and mix your dough. Your dough should be dry and crumbly, but able to stick together when you smoosh it under pressure. We needed more oil, though, so we added it in 1 teaspoon increments until our dough was wet enough to stick together. Take a small dinosaur and press the dough around it to cover it and make it look like an egg shape. Let your dough dry overnight. Even though the dough was crumbly when we worked with it, in the morning it was solid!
On the day of the party, I put out a large under bed storage container on the table, filled it with water, and told my teens to give out one egg to every child who came to the table. The kid simply dropped their egg into the water, and the dough began to fizz, eventually revealing the dinosaur as it appeared to “hatch” from the fizzing egg. Super exciting!


Dinosaur Tooth Necklaces:

We made four batches of salt dough using the recipe: 1 cup salt, 2 cups of flour, ¾ cup of water. I shaped the dough into dinosaur teeth about 2” in length. Before the dough dried, I poked a hole through the top at the top of each tooth so that we would be able to string them once they dried to make them into necklaces. The dough needed a few days to dry, but we had them on a shelf in our storage room, so it was not a big deal. You will want to turn the teeth over every day until they are totally dry, so that they will dry evenly. Or, bake them in the over on the lowest heat setting for a few hours. Once they were dry, we strung them with string. On the day of the party, I had the necklaces out with white and red beads. Kids were invited to choose a tooth and string beads on the string. Super fun!

Dinosaur Etchings:

I purchased some rubbing plates from Amazon for $8. I matched the plates we were given with FREE PRINTABLE dinosaur fact sheets from Ed Galaxy. That way, kids could make a rubbing, and learn something about their dinosaur at the same time! This again was a very popular station!


Finally, …drum roll….the Dino Dig Station!

I bought four under bed storage containers and filled each with a bag of sand. We then made dinosaur-looking bones out of salt dough, and filled the containers with them. I set out paintbrushes in each container, so that kids could use the brushes to “paint” away the sand from the bones. I thought that kids would want to just dig in the sand with their hands, and they did, but nearly every one of them used the paintbrush to brush away the sand when they discovered a bone. Some kids wanted to keep them, but I told the volunteers to instead invite the kids to re-bury the bones. Super, super fun!

If you have ever wanted to plan a dinosaur party, do it! This program had a great mix of families and kids from birth-grade 5 came to play! It was one of our largest programs, and we had so much positive feedback during the event, and afterward on Facebook when parents posted great photos of their kids!

Have fun with dinosaurs!