Jedi Knights have assembled children sensitive to the force to test their Jedi abilities. Under the tutelage of the Jedi masters, the recruits must learn how to use the force to wield lightsabers, discover their Star Wars name, design their own ship, shoot down Storm Troopers, assist in a mission to destroy the Death Star and build their own droid. Come and join us, my young Padawan!

We offered “Star Wars Jedi Training” the third week of our summer reading program and it was a big hit! We offered this on Monday evening and again on Tuesday morning! One prep and set-up for two huge program days! And, only one clean up on Tuesday after the program was done! Horray! The costs were incredibly low and families wanted to stay at the library playing with all the activity stations for about 90 minutes, significantly longer than many parents/kids usually have the patience for with a room filled with excited people! That alone was a great sign!
The skinny:
We offered our “Jedi Training” as a program with eight activity stations:
Because I really, really, really wanted the kids to be able to take a lightsaber with them when they went home, we also had a final station where the Jedi Master would make a lightsaber for each of the kids once they had completed all the activity stations. The lightsaber was a balloon, like the kind you use to make balloon animals. Perfect for my budget! And, all the kids LOVED them!
I also had our Star Wars books set out in a display, and Star Wars music was playing during the program, definately helping to set the Star Wars mood!
Cost:
- About $10 for 250 balloons to make lightsabers, which we did not go through.
- $8 for a balloon pump on Amazon
- $4 for 4 pool noodles which we turned into pool noodle lightsabers!
- $2 for regular balloons which we used in the lightsaber training with balloons station.
And, here is my breakdown for the activity stations:
Welcome Table and Scavenger Hunt:

We set up a table near the door so we could greet families as they came in. I made up a Training Card with all the activity stations listed and told the kids that to become a Jedi Knight, they needed to complete all the activity stations on their card. A volunteer at each station (or a volunteer who was “hovering” and covering several activity stations) checked off their boxes once the kids were done with the station. Here is a like to my Star Wars Training Card. I also had the paper for the scavenger hunt at this table as well, and I trained in three volunteers to be able to help the kids find the objects in the children’s library. This scavenger hunt was done by Jbrary! Thank you! Kids were able to find different areas of the children’s library by looking for the star wars characters on their Scavenger Hunt, a win-win for everyone! You can access Jbrary’s Scavenger Hunt file and post HERE. If you have a volunteer who can help lead kids around your library looking for the characters, that would be best, as some kids found this challenging. I also laminated the Scavenger Hunt pages. The kids wrote on them with crayons, and a tissue wiped the crayon marking right off! Doing this meant that I only needed to print out the Scavenger Hunt on 10 pieces of paper, instead of 80!
Discover Your Star Wars Name:

Thank you, again, Jbrary! Okay! To find your Star Wars first name you combine the first three letters of your last name with the first two letters of your first name. For me, Emily Zorea, my Star Wars name is Zorem! I gave kids reusable nametag holders which they filled out and wore throughout the program! It was a great way to begin conversations with kids! Before kids received their Jedi lightsaber at the end of the program, the Jedi volunteer asked kids to give him their nametag so we could recycle it. Some kids wanted to keep their name, so they took out the piece of paper, but I think we were able to collect all the nametags again! I had a volunteer at this station, but you could get by without one.

Demonstrate your design skills at the Coloring Station:

I found amazing coloring sheets created by Amy at EncouragingMomsAtHome. Thank you! I printed them off, and kids loved them, often coloring more than one! I usually set out coloring as an option for many of my family programs, and it can get a lack-luster response. These pages, though, were so cool that kids stayed at this station as long as any of the others! No volunteer at this station.
Attempt to Sink The Death Star

The Lego Librarian had this great idea! We cut cardboard into a large circle, and two of my middle school volunteers helped me paint it into something that looks like the Death Star! We folded a dozen paper airplanes and kids tried to fly their paper airplanes through a hold I cut towards the top-right part of the Death Star to “sink” it. Lots of fun, and harder than it looked! We had a volunteer at this station, but it basically runs itself.
Design your own Star Wars Ship

I set out our LEGOS, and kids had a blast! Seriously, I always underestimate how excited kids will be to build with Legos, and they had some great designs! I had a volunteer here, but again, this station really does not need one!
Defend Against Storm Troopers:

Thank you again, The Lego Librarian! I found some images of Storm Troopers online and printed them out so we had two images to a page. I then asked our volunteers to paint toilet paper rolls white and then cut out the Storm Troopers. Then, they glued the stormtroopers to the toilet paper rolls so they would stand up. My son brought his Nerf guns and was the volunteer at this station where kids defended themselves with Nerf guns against the Storm Troopers. You definitely need a volunteer at this station to keep the kids controlled, load the Nerf guns as needed (most kids did not know how) and to teach good shooting range protocol. No one was allowed to shoot if someone was between the Nerf gun and the Storm Trooper. Also, kids lined up in a row and they all fired at once and then walked over to the Storm Troopers to retrieve their Nerf bullet. It kept this station going, but also taught important safety. Kids were told that aiming the Nerf guns at another Jedi-In-Training (or family member) was never allowed, and all of the kids followed this rule. Great fun, even with the necessary rules and safety! You will have kids asking if they can do this again and again!

Build Your Own Droid

Thank you again, The Lego Librarian! I used his templates for the droids, and just set out cup-up scraps of paper and glue sticks Kids designed their own droid! We had a volunteer here, but you could get by without one as long as someone comes over every once in a while to clean up the station.
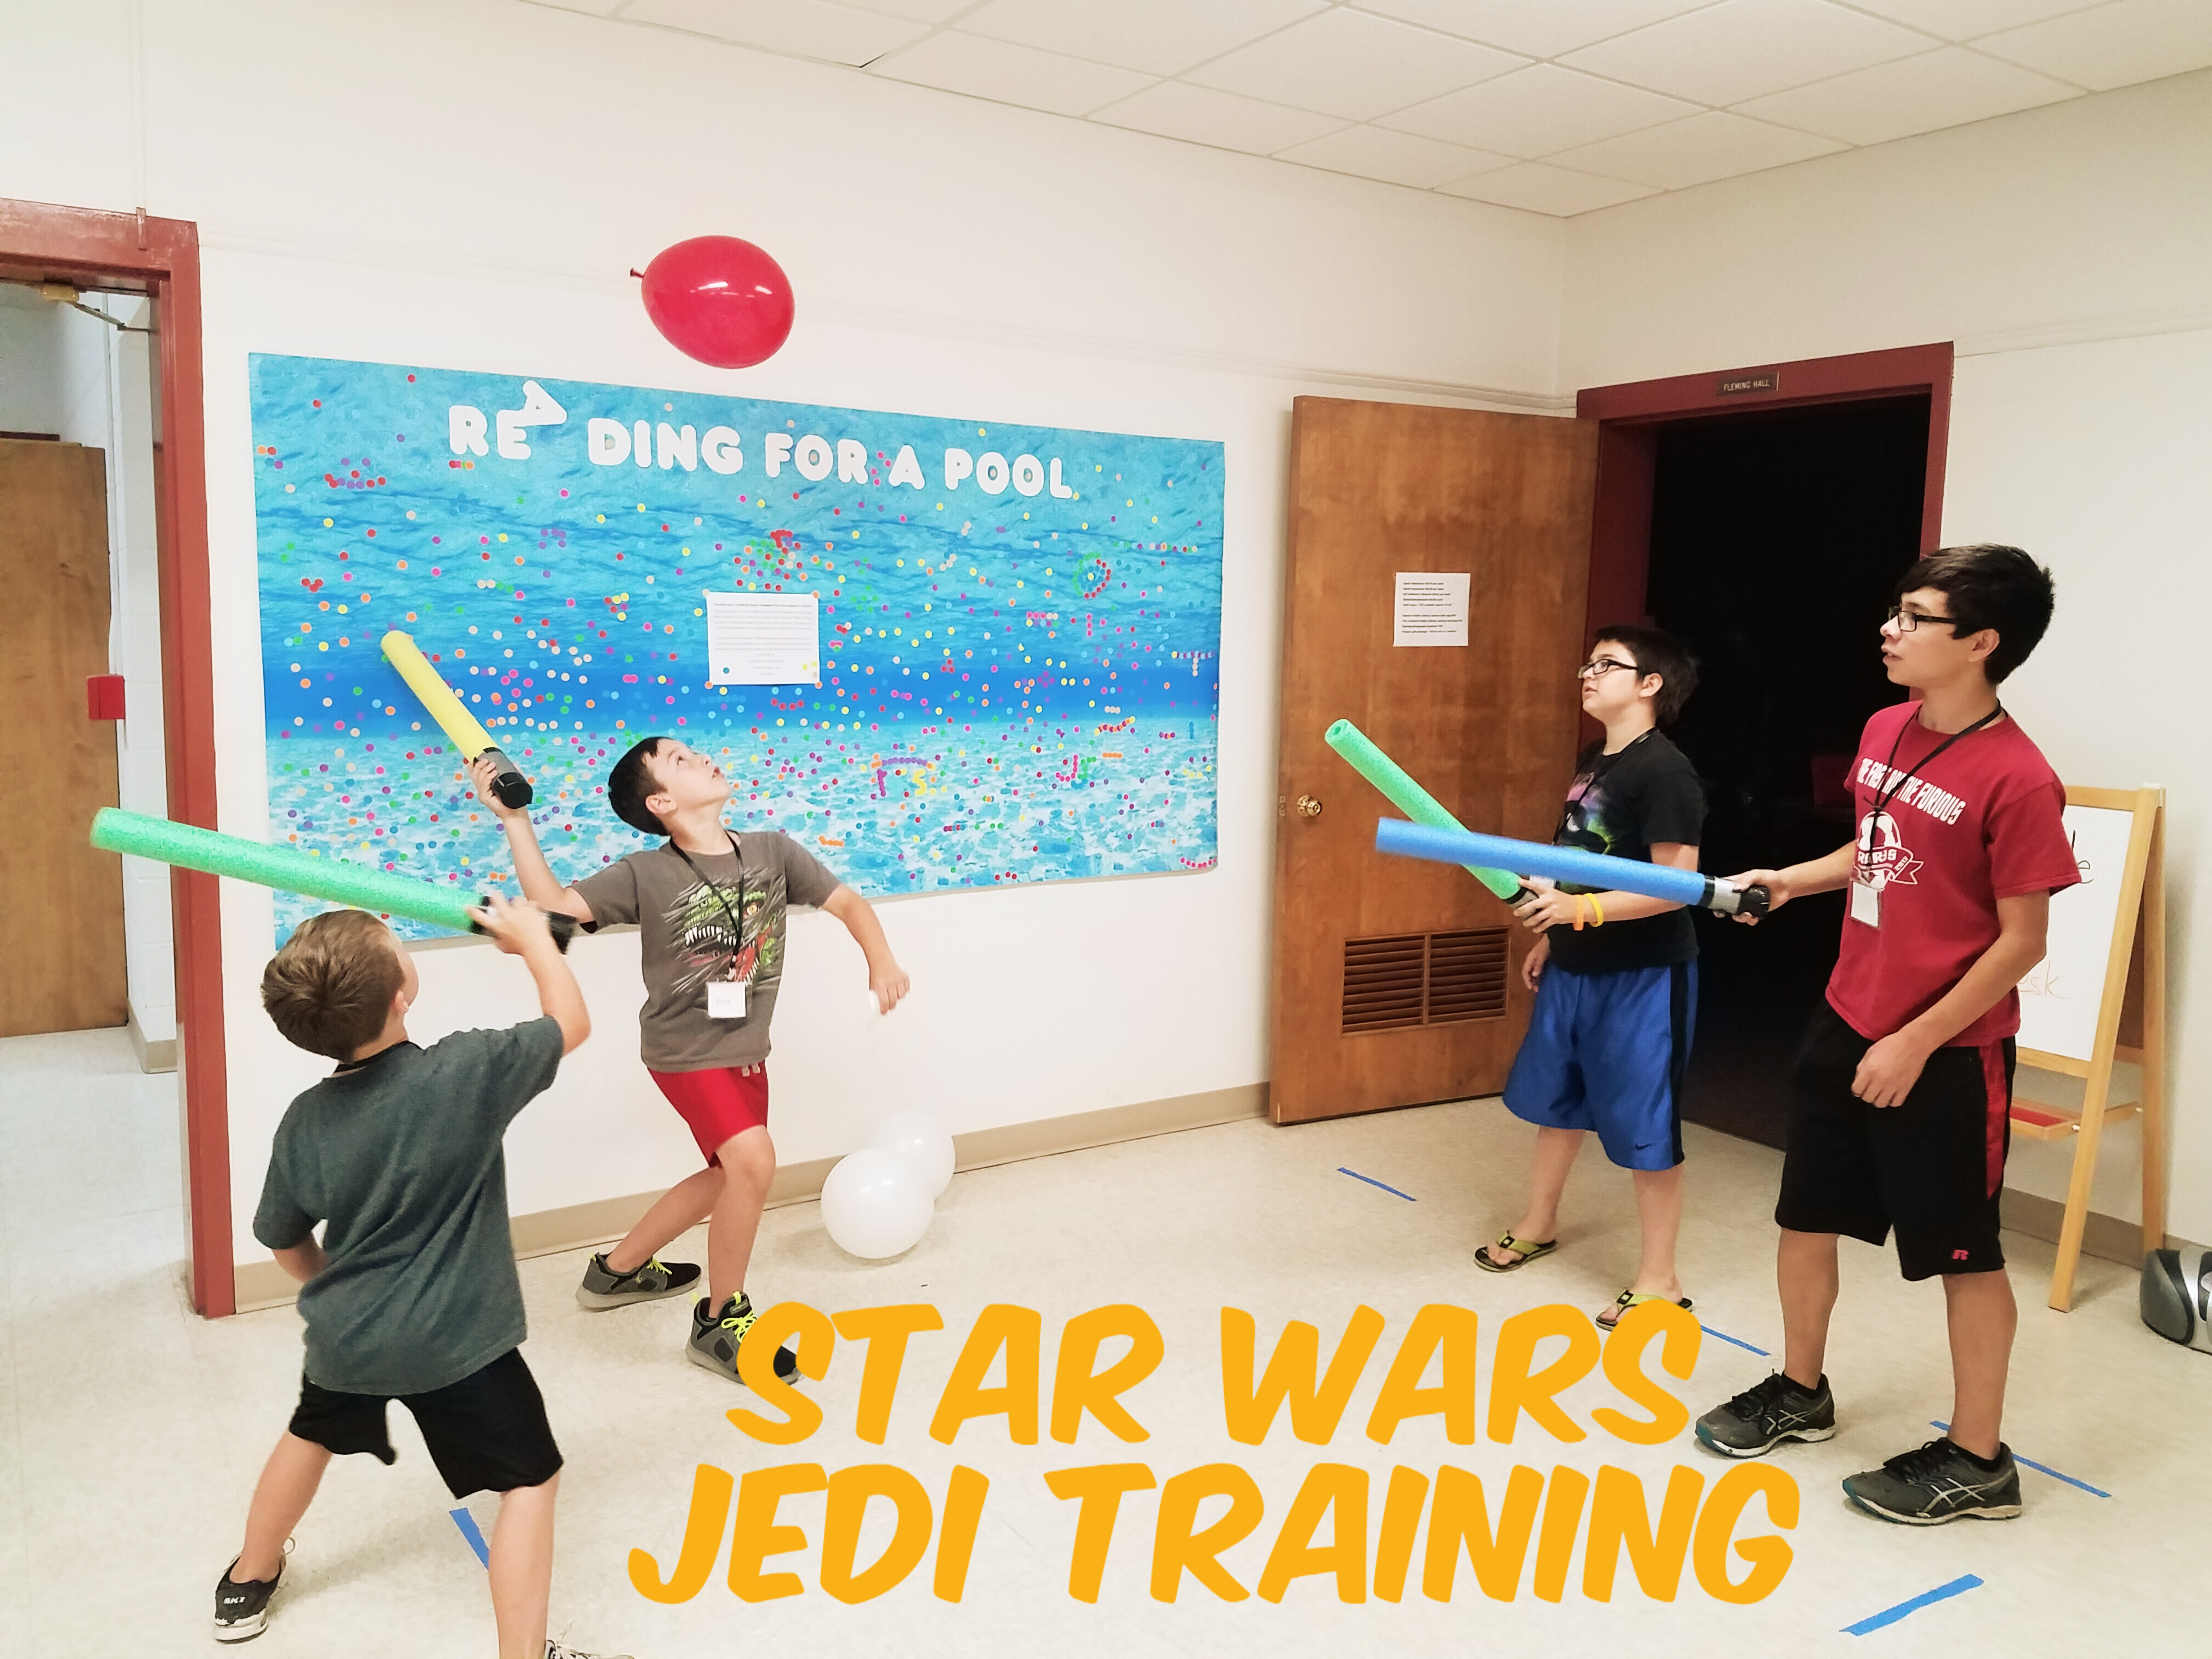
Light Saber Training with Balloons!

I cut a pool noodle in half, and then taped the ends with duct and electrical tape to create a lightsaber. You can also use sharpie markers to create lots of detail. I marked off a space in our programming room with tape on the floor and assigned two volunteers to lead this station. I found out that this worked best for us when I only had four pool-noodle lightsabers at the station at one time (basically, four kids at a time). I also put four balloons in this station and the goal was for the kids to either balance their balloon on their lightsaber, or bat their balloon up and down for as long as they could before their balloon hit the floor, or to pass their balloon to a partner. It went well, and parents told me they were going to make a trip to the Dollar Store on the way home to pick up pool noodles to make their own at home!
Finally…you are a Jedi. Come and receive your Lightsaber!
I do not have great photos of this, unfortunately. But, here is how this worked. Once kids had completed all the stations my son would blow up a “balloon animal” balloon and twist it into a sword for these “Jedi-Knights No-Longer-In-Training”. The kids loved it. We had a few ballons pop on their way to the car, but my son kept twisting and made replacements as needed. It also gave the kids something to take home along with their new droid and in addition to those Star Wars books they checked out!
Have you done a Star Wars program recently? I would love, love, love to hear your ideas! Please leave a comment below! May the Force be with you, my librarian friends!


 Queen Frostine