Fairy Tale STEM: The Three Billy Goats Gruff

The skinny: We did this program as both a book club program for Kindergarten-5th grade and as a Kindergarten class outreach visit. Both programs went great! These programs were born out of a mission of mine to incorporate more literacy into our STEM programming. What better way to do that than read a great fairy tale, incorporate literacy vocabulary by talking about the characters and what the problem was in the book, and then engineering our way to a better solution?

The cost: $0. We already had all the supplies on hand. But, if you don’t, you can buy clothes pins online for $6-10 for a pack of 100 and the tongue depressors for about $6 for a pack of 500. And, all the supplies are re-usable! You might also want to buy some small goats for the kids to play with as they are building their bridge. I searched on Amazon for “toy goat” and found some great options, like this pack of 25 for only $10.

Supplies needed: Clothespins, wide craft sticks, and the book, The Three Billy Goats Gruff by Paul Galdone.

Resources: Check out the Teach Beside Me blog where I got the bridge building idea for this program!

Time: Plan about 30-40 minutes for this program.

How it went: For the book club I did this as part of our Cookies and Milk book club series. We hold this on Tuesdays at 3:45 pm. To prep, I buy a half gallon of milk and a value sized bag of Cookie Crunch cereal. I never know how many kids will come so when they arrive I pour the milk and cookies while chatting with the kids about anything they think is important. Once they have their afterschool snack, I introduced our book, The Three Billy Goats Gruff by Paul Galdone. I had kindergarten through 5th graders, so everyone knew the story already. But, they had a glass of milk and another glass of cookies, so why not be excited? I read the story, having the kids help with the narration by asking, “And what did the troll say?” just to keep everyone engaged. After reading the story we talked about who the characters were (The Three Billy Goats Gruff and the Troll) and what the Billy Goats’ problem was (they did not have a safe bridge to cross). I brought out our clothes pins and tongue depressors and asked them to make me a bridge that would be safe. Some of the kids struggled with this, so I showed them a few ways to build. What I really liked about this was that it was simple enough for the youngest kids to do on their own, and yet difficult enough for the older kids to come up with bigger and better ways to build.

Have you tried Fairy Tale STEM? What are your favorite programs? I would love to hear from you!


littleBits in your Library’s STEAM Programming: Part 2

This is Part Two of my posts on littleBits programs we hosted at Brewer Public Library. Click here to read Part 1 where I explain the kits that our library is using, discounts available for librarians, and four lesson plans using the Workshop set.

Before last year, littleBits were not familiar to me. However, there is a very generous foundation in my city and they invited me to submit a grant on behalf of Brewer Public Library’s youth services department. I looked online for ideas of popular STEAM based programming at public libraries that I could use as models for my grant, and WHAM, I discovered littleBits. We have a very small budget at our library, and I try to stretch our funds out as much as I can (I budget $0.30 a child, and usually I try to do programs for less). This grant, though, allowed me to dream about programming options that I would never be able to offer otherwise.

I offered four littleBits programs in January, and parents/kids kept asking if I would continue the littleBits programs throughout February, so why not? Finding lesson plans was a little tricky, but we came up with four lessons that stretched the kid’s ideas about circuits. Our programs lasted from 30-60 minutes (including time at the end of kids to sort their littleBits and clean up). Also, we had attendees ranging from 5 years old to 12.

The videos were created to help promote the programs on Facebook. Many parents told me they came to the program just because they saw the video of what the kids would be creating. Click on the title of each lesson plan for links to outside resources that provided the inspiration for these lessons.

Lesson 5: Olympic Torches

Bits needed: Battery and cable, power, wire, latch, inverter, RGB LED.

Bit+Co. had a great lesson plan for birthday candles made from littleBits, and I just adapted it for Olympic torches. Again, I placed all bits required (power, cable, battery, wire, latch, inverter, and the RGB LED) into Ziploc bags ahead of time to not confuse kids about what bits they needed to make the project. I also had popsicle sticks, rubber bands, tissue paper, and tape out on tables. After creating their torch, I opened up all the littleBits to them for free exploration.

Lesson 6: Three Wheeler

Bits needed: Battery and cable, power, DC motor, light sensor, wire (2), wooden skewer, cardboard circles for wheels.

Full disclosure: This program did not work when we did in on program day. Sure, it worked for me when I tested the lesson plan out. Sure, it worked for the three kids who peaked around my desk to see what I was doing and wanted to make one to. But, on the day, it was a real opportunity to let the kids know that science and engineering is about working through challenges. We used chopsticks and cardboard cut out into circles for the wheels and axles, which did work, but I think that using LEGO wheels and axles would work better. However, all the kids were able to get their three-wheeler working before the end of the hour program!

Lesson 7: Art Bot

Bits needed: Battery and cable, power, DC motor, chalk/crayon/marker, rubber bands.

Again, full disclosure, we had a hard time getting this one to work too. But, all the kids were able to get it working in some capacity, and again, it was a good moment to let kids know that it is okay to struggle.

Lesson 8: Backpack Security

Bits needed: Battery and cable, power, light sensor, pulse, buzzer, screwdriver. We ended our programming on a high note with this one! Kids loved the idea of a security system at school that they could build for themselves!

More Lesson Plan to Try: 

While looking for lesson plans I found sever more that would be great to try in the future! If you have already done these, let me know!

Inchworm

Olympic Skier


Kids STEM Lab: Paper Airplanes

Building paper airplanes is the stuff of kids and imaginations! Intentionally incorporate some physics vocabulary terms, with some experimentation time, and you have a fun program to interest kids of all ages!

The skinny: This was one of the more challenging programs I have done. I try to plan our STEM programs so families can come together, and we have kids who are three years old with siblings who are ten years old. That is a big age difference, but my most successful programs happen when I am able to find activities that allow kids of differing abilities to acomplish the activity successfully. Airplanes are hard because making folds in paper according to directions is not something that young kids intuitively know how to do. But, it was a great exercise in showing kids how to follow directions, a necessary skill in STEM.

The cost: $0. I set out some white copy paper, pink construction paper, and masking tape. We also set out pennies from past programs that we keep saving and re-using.  We already had all these supplies on hand, but if you needed to purchase the paper and masking tape, I would estimate maybe $5 in supplies. At most.

Resources: There are great blog posts out there on airplane STEM, but two of my favorites planning this program were Airplane Science by the Show Me Librarian and STEM Paper Airplane Challenge by Kids Activities. I also utelized the book, Paper Airplanes by Jenny Fretland VanVoorst.

  How it went: We began the program by sitting in a circle and talking about paper airplanes that we had all built in the past. Kids have great stories about planes they have built and the different “flight” patterns their planes exhibited, and it was a great way to build comradery in the group and practice conversation skills. By the way, I had kids in the program as young as two and as old as ten. I then took out the book, Paper Airplanes by Jenny Fretland VanVoorst. Depending on the group you might want to read the whole book, or, especially focus on pages 12-19. For our program, we focused on the physics vocabulary terms” Gravity, Thrust, Lift, and Drag. After reading the book I wrote those four words on the whiteboard and we talked a little bit more about those terms with an example paper airplane.

Then, it was time to build! I had a copy of instructions for the classic paper airplane open on the table similar to these instructions. Some of the kids were able to fold the paper into the pattern, and some of the kids needed help. No problem. After building their plane and testing it out, I invited the kids to tape down pennies on the wings, bottom, and sides of their plane. The challenge was to see which plane could carry the most money “cargo”. After the kids had taped their pennies down, we had a contest of sorts where the kids were able to line up and fly their airplanes. WARNING: be sure that no one is in the way when the planes go off! Pennies will fly off the planes, so just be careful! No one got hurt, lots of kids were laughing and smiling, and parents chuckled to see their kids having so much fun. It was also a good way to practice safety instructions, which will be helpful as these kids keep advancing in school and taking science courses.

The kids loved seeing their planes fly! We went back and forth between flying and going back to the work tables to tweak designs. In the end, I think we had about 12 rounds of flying the planes before having everyone sit down in a circle again. We talked about our four physics vocabulary words that help explain the forces behind why paper airplanes fly (and crash). I also was able to ask the kids how much money cargo their plane was carrying at the last round. After a few minutes of sharing, I asked the kids to help me pick up pennies that had dropped to the floor. Kids asked to keep their airplanes, which was a good sign they had enjoyed themselves. One mom commented that during a snow we had about a week ago her sons had built 70 paper airplanes in one afternoon! However, they did not know how to fold them correctly, so none of them flew as well as her sons wanted. She specifically brought her boys to this program to learn how to fold their paper airplane so it would fly, and I think her sons were some of the proudest children all evening of what they were able to build by following the directions.

Have you done a paper airplane STEM program at your library? I would love to hear about it!

Kids’ STEM Labs: Newspaper Geodesic Domes

You never know where an idea for a STEM Lab will come to you. For this project, it was while driving to Grandma’s house over Christmas break. My son needed to create a geometry project that was due the day after break ended. Although my son knew about this project in October, like any teenager, he had procrastinated. So, when my husband realized that our son had not yet begun to work on this project, and it was due in a few days, he went into brainstorming mode. The result? My historian husband began talking about geodesic domes. These domes are made completely out of triangles, yet, they have the strength of rounded arches! They do not require any internal support or walls, in a natural disaster, they are one of the safest structures. Obviously, this means we need to plan a STEM Lab around them! Read more

LEGO Expo

Kids and Legos. Is there a better combination? I am not sure. But, I do know that a LEGO Expo was one program that I had on my wish-list all year, and at the end of November, we made it happen!

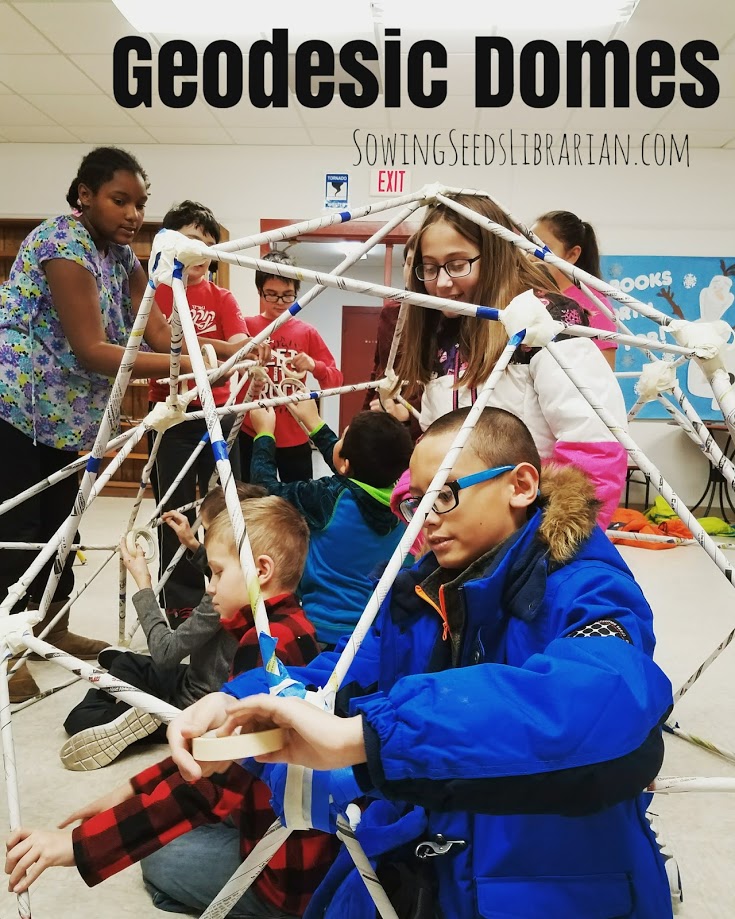
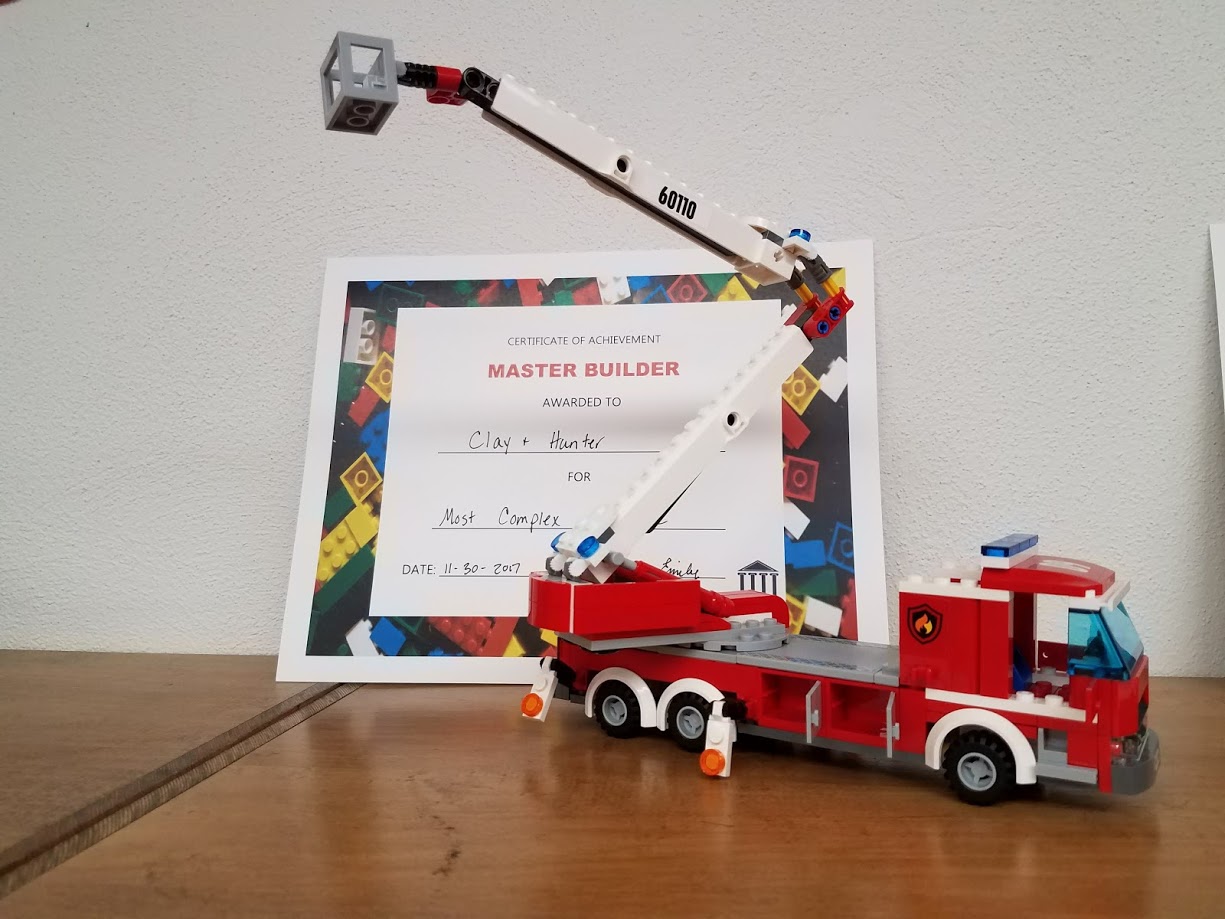
This program was both difficult, and easy. I usually have Legos out in the children’s library on Tuesdays after school for kids to come in and build with freely. But, for this Lego Expo, I wanted the kids to be able to show off the projects that they work so hard to build. I heard a great idea from a colleague (thank you, Kelly!) about how her library hosts Expos, where kids are invited to build their Lego project at home, and then bring them to the library to be entered in the contest! A judge comes and awards certificates! Kids gain recognition for their creations! And, the Lego projects are left at the library for several days/ weeks for community members to see and enjoy viewing what kids built. Sounds like a win-win all the way around! Read more

Kids STEM Lab: Marble Drops

Marble Drops. So simple. So fun. And, a great time to exercise design, problem-solving, and critical thinking skills while creating a slide for a marble to run down! I stood back for most of the program and watched parents and grandparents work with their kids to create the design their kids wanted for an entire hour. At every STEM Lab, I hope that the activity is engaging enough for kids to interact with adults and learn together as a community. That happened with this program!

The skinny: Great problem-solving exercise that the parents wanted to get in on as much as the kids! So many smiles as kids worked with their adult to create something fun at the library. I drew my inspiration from Coffee Cups and Crayons blog. They have a great video of how her kids did their project, so be sure to watch! This is a great project because even pre-kindergarteners were able to do it, as well as big kids. And, families worked diligently for a whole hour before they felt their design was just right, showed me how it worked, and then helped me clean up before heading home.

Read more

Kids’ STEM Workshop: Tabletop Coding

Tabletop Coding

One aspect of the coding revolution that is sweeping libraries around the country is the idea that we can expose youth and adults to coding concepts without even needing a computer. This is based on the idea that coding follows logic, and logic we can demonstrate and experiment with without fancy equipment. This is great news if you have a large group for a coding program, and you know that you do not have enough devices or gadgets for everyone!

I was able to lead a no-tech coding program for a class of 5th grade students with no computer needed. We worked on the Tabletop Coding kit, which you can download from Wiscode.org. This lesson plan does not require any technology, and instead uses a checkerboard, two game pieces, sticky notes, and index cards to show students that computer programs are made from sets of instructions to achieve a pre-determined goal.

And…even without technology…our students loved this activity!

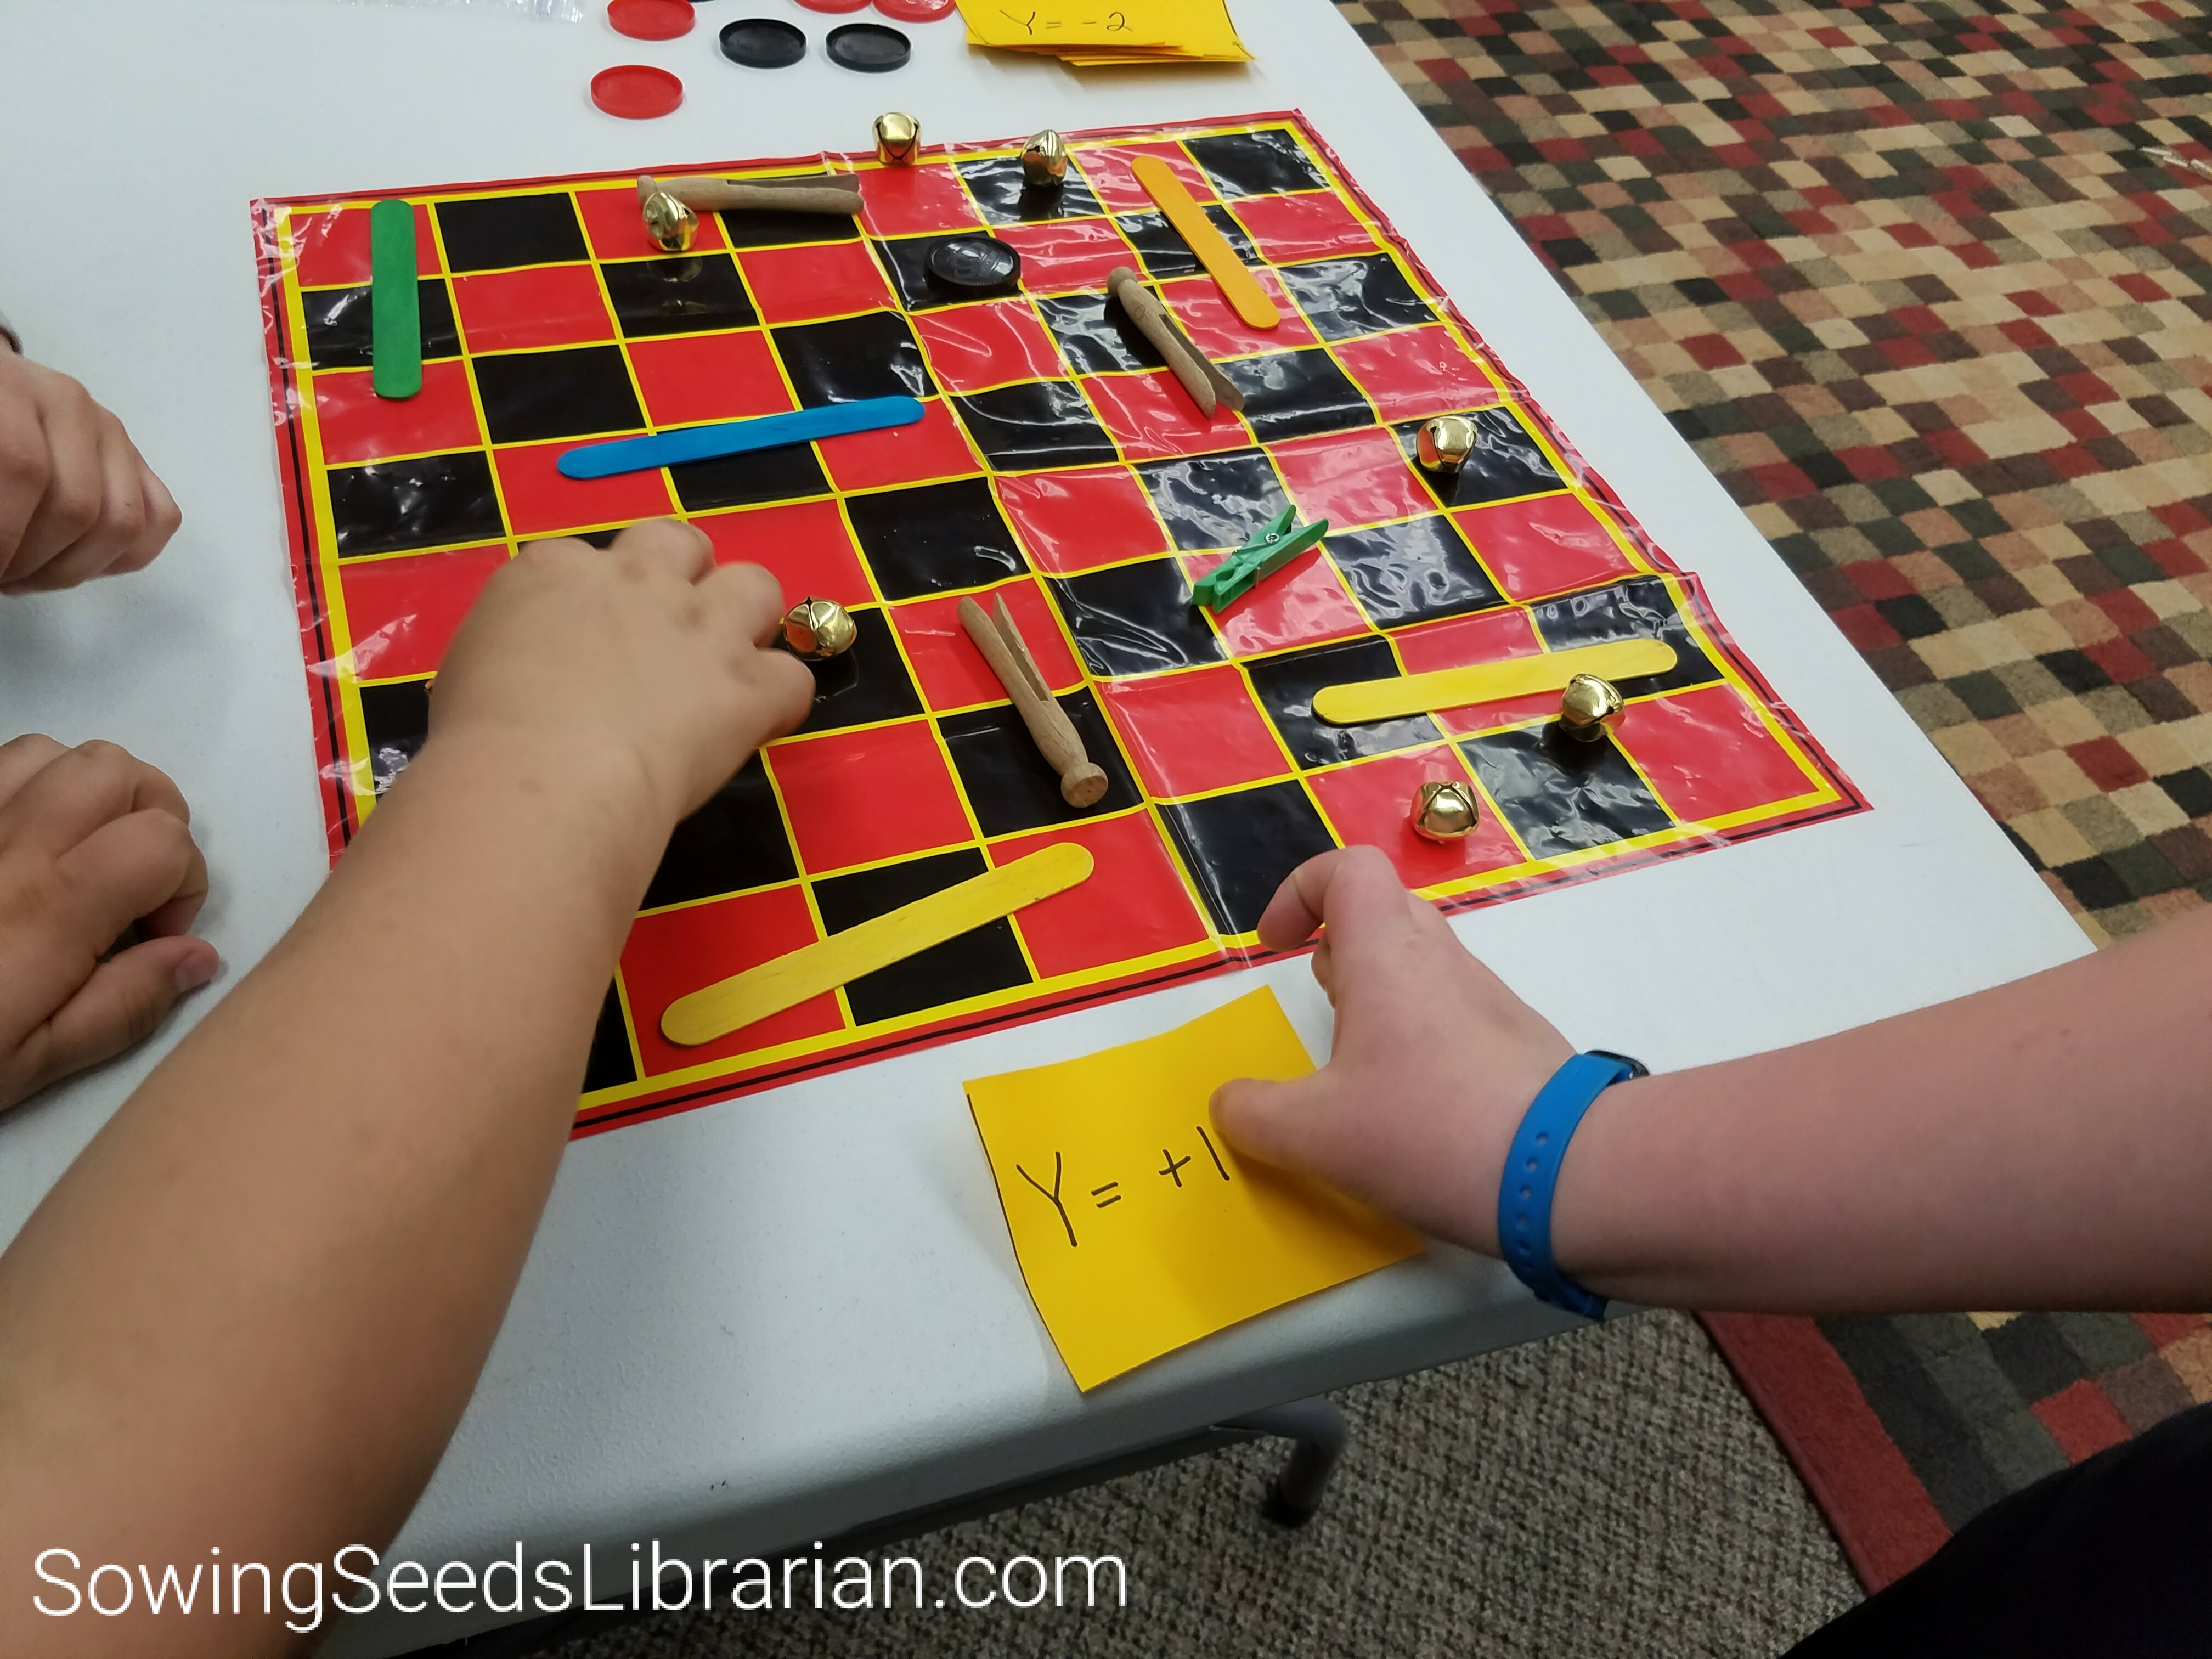
The skinny: This was a great program, and my students ran with it! They developed complex ideas and games just using their checkerboard and some random objects that I made available to them. Two students turned their checkerboard into the house in the Westing Game book. The goal of their “program” was to help a kid travel through the house without being hurt. I was surprised at how creative they took this, just using the simple instructions I gave them.

Cost:
$0. We already had the checkerboards already on hand! You will need one checkerboard for 2-3 students. I would not try to make the groups any larger than 3 students.

Time needed:
For this 5th grade group, this activity took about 30-45 minutes.

How it worked:

I followed the lesson plan from WisCodeLiterati. I showed the students a checkerboard and gave myself two checker pieces. I randomly placed my red and black checker piece on the board and told the students the object of their program was to write instructions to make the red checker piece land on top of the black piece without moving the black piece. I showed them the cards that I made them, and how the “X” cards allowed their red checker piece to move horizontally, and the “Y” cards allowed their piece to move vertically. I then placed  a basket filled with odds and ends from my craft room on the floor. I told them that they could place these objects on their board to close off certain squares. They would have to write their program to go around these objects. I then gave groups of 2-3 students their checkerboard, two checker pieces, their deck of “X” and “Y” direction cards, and told them to have fun!

As I said, I was really surprised at how seriously the kids took this activity! They looked through their cards, and quickly found the order that they needed to organize their cards to bring their checker piece where they wanted to go. Then, they began to add obstacles and then arranged their cards again to avoid those obstacles. It was a lot of fun to see how creative they were!

This is a very simple activity, and the students caught on to the computer science of it right away! If you would like to begin offering coding programs, I would highly recommend this program! It can be adapted for any age, and it requires very low cost, set-up, and preparation!

Have you tried a “no-tech” coding activity? Do you have ideas to share? I would love to hear them!

Happy coding!


Conference STEM Presentations

Whew! What a week! I had the great privilege of presenting our library’s work on Kids’ STEM Workshops at not one but two state conferences on Thursday (WAPL in Steven’s Point) and Saturday (Wisconsin AfterSchool Association in the Wisconsin Dells). This was my first solo presentation. Thank you to everyone in the audience for being so friendly as I shared about our STEM adventures this past year!

Here is my PowerPoint from both those presentations. It was wonderful to meet so many energized colleagues from across our state and hear about what they are doing in STEM and STEAM. I am on the lookout for great program ideas. If you have done a STEM program, please let me know about it! I would be happy to use it as a model for our community! September is coming, and that means a whole new year of lesson planning!

Thank you all so much for what you do every day for our communities. It re-energized me hearing from you and the work you do!

A Year of Adventures in Kids’ STEM Workshops (PDF)

A Year of Adventures in Kids’ STEM Workshops (PowerPoint)


Week 1: Coding Together: Learning Together

Coding is everywhere right now! Lesson plans are on Pinterest, kids are talking about it, coding clubs are springing up all over the nation, and libraries are now offering coding programs to showcase how to create computer code for our youth, families, and adults. This spring, I was privileged to participate in the four- week online “Coding Together, Learning Together” course provided through DPI and taught by Casey Ineichen. This course was designed as a quick introduction to the wealth of coding opportunities and options for public libraries when planning programs. These were the course goals:

Learn the basics of coding and how to plan a coding event for your library so that: 

●You can share the basics of coding with your library patrons.
●You can select appropriate coding tools and software for your library and community.
●You can plan coding events for your library and community.


I found that this course was exactly what I needed to put my abstract plans about coding into a plan that was specific and timely. I understand that this course will be offered again, so if you are interested, stay tuned to Wisconsin’s DPI.
I will be blogging about my experience in this course. If you would like to learn more about code, like I did, try to work your way through some of the activities and websites that I will be posting.

Read more

Kids’ STEM Workshops: Thinking in Three Dimensions with KEVA Brain Builders

Today we get to work with puzzles! You only get 20 planks, and they all look the same. How many objects can you create with those 20 planks? A lot. How much fun will you have? Again…a lot!

The skinny: This was a very simple program to put together. I ordered six sets of KEVA Brain Builders from Amazon for $15 a set. This was much more than the $0.30 per child budget that I have been working with. However, these sets were made available to us through a grant. Also, I am able to use them over and over again. So, in time, the price for these sets will go down to less than $0.30 because of the repeated use.

Read more

Kids’ STEM Workshop: Binary Code!

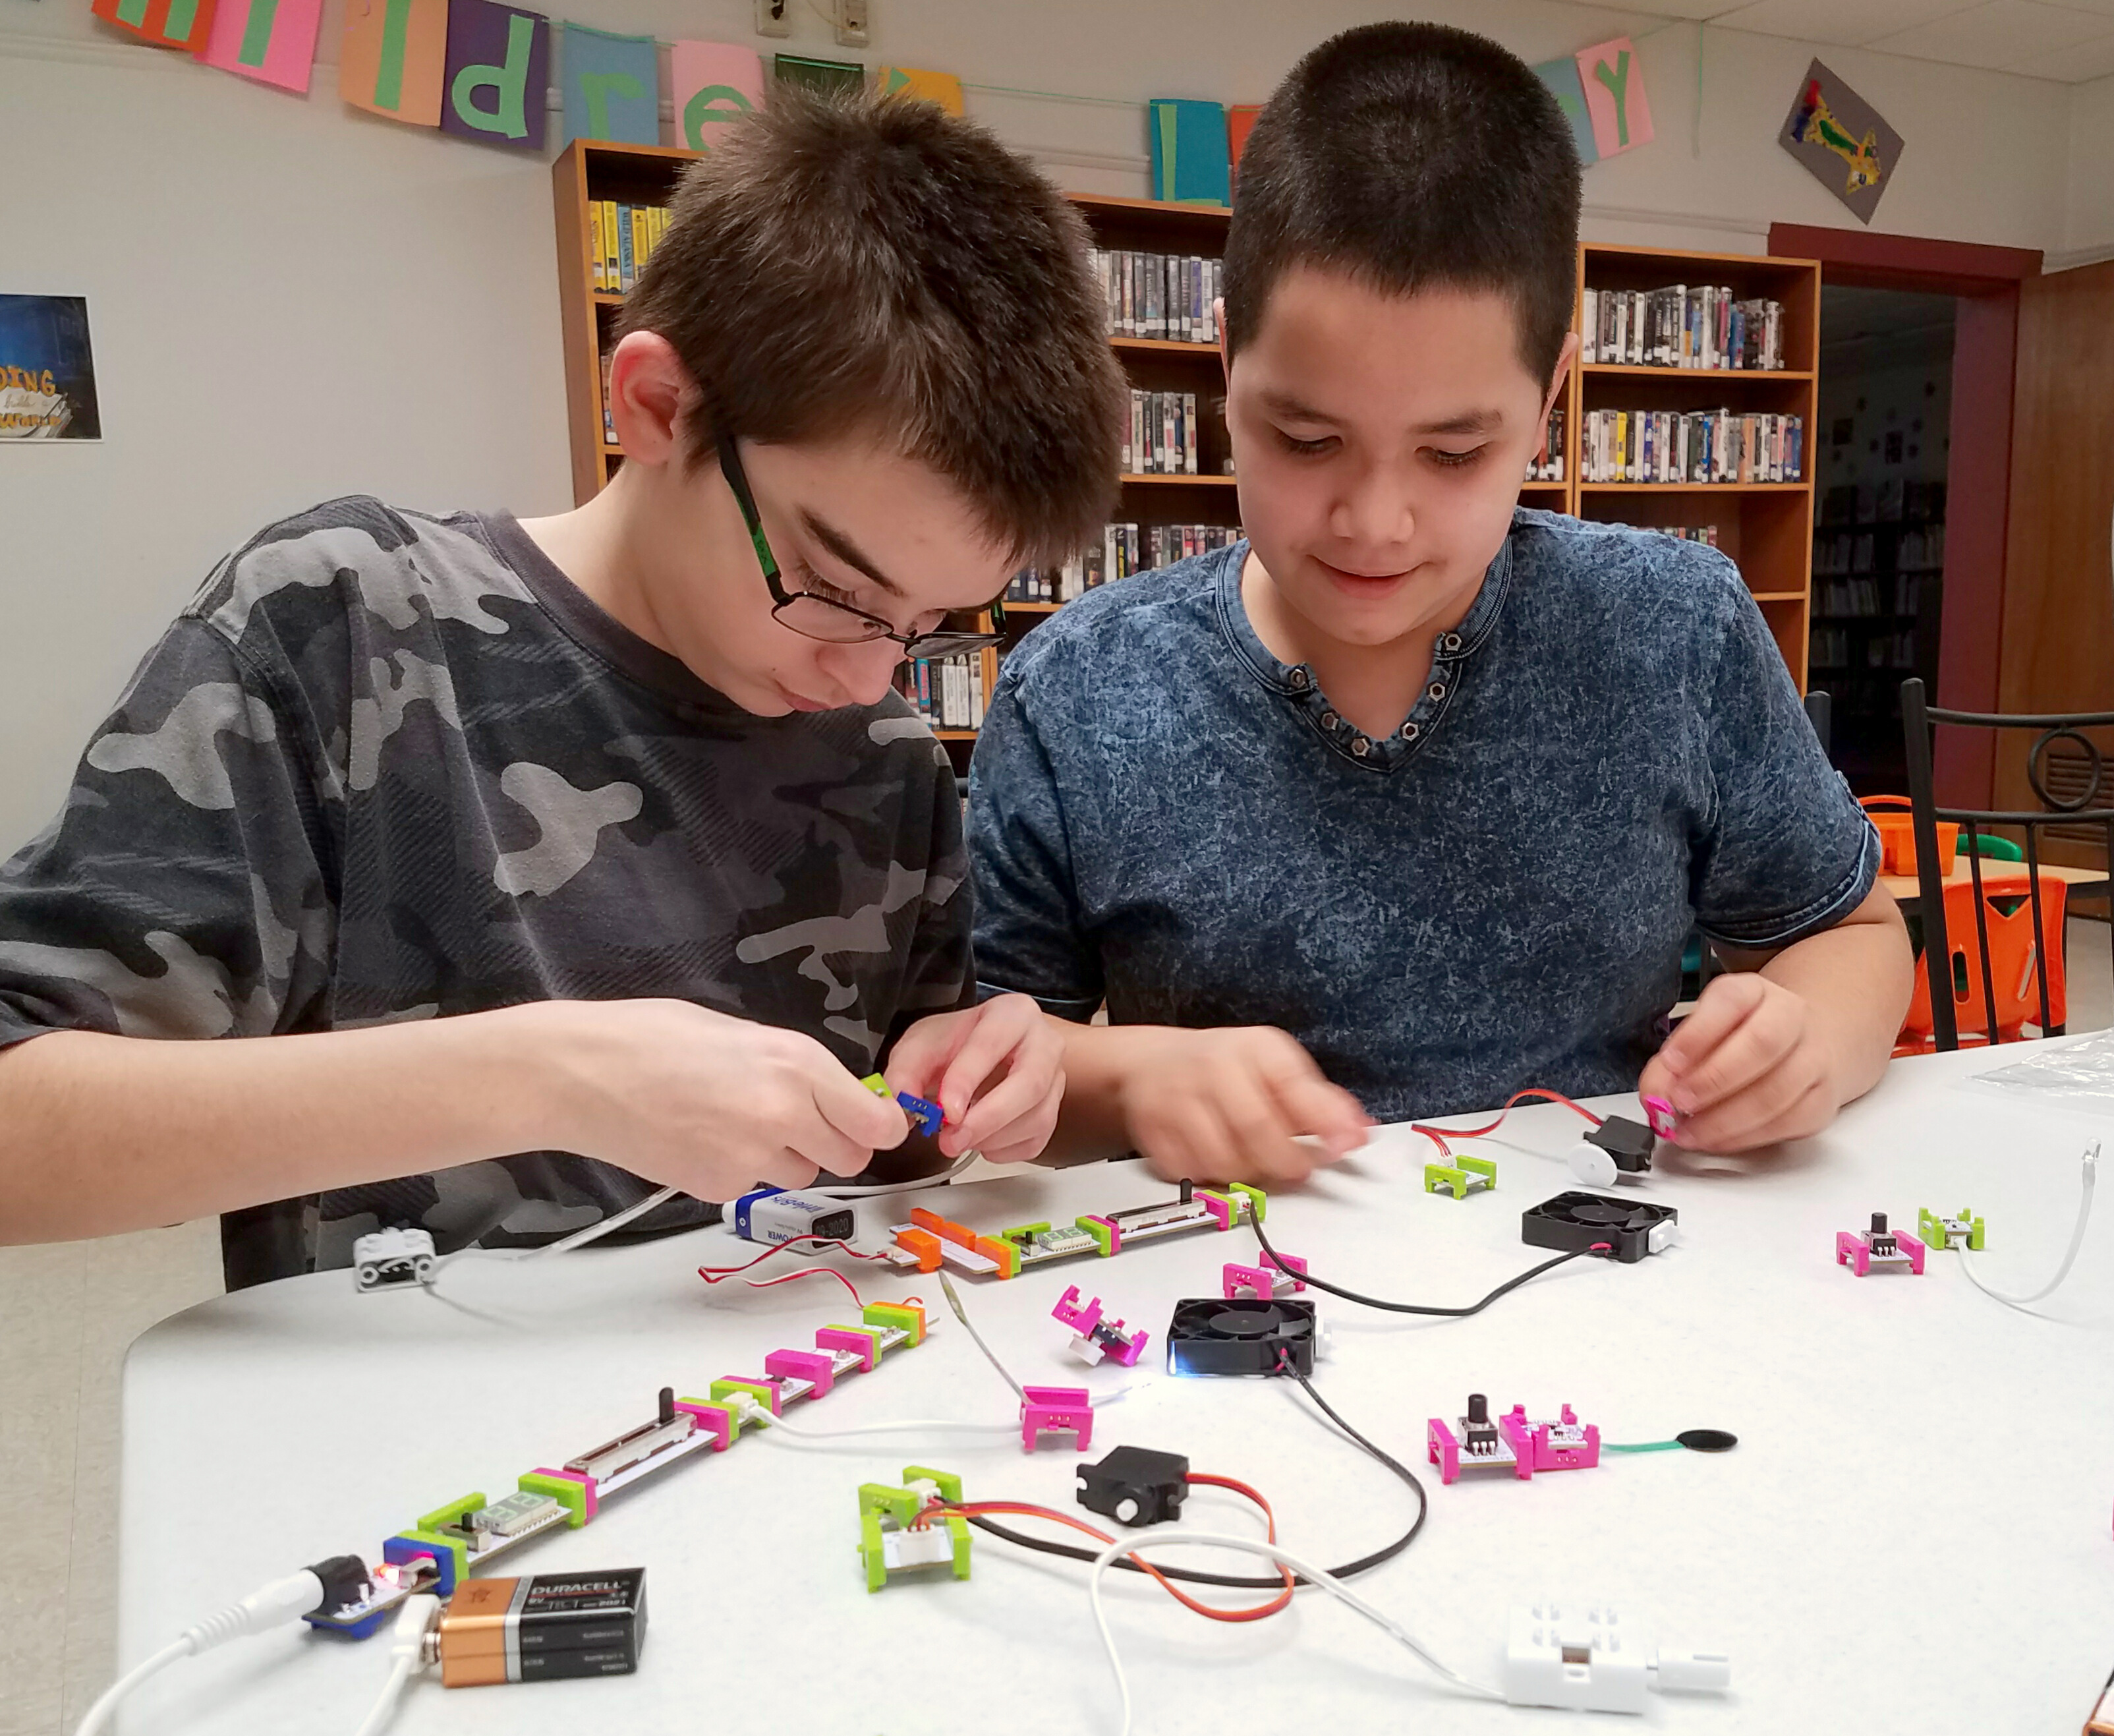
We live in a binary world. Our computers, music, books, magazines, almost every form of media is digital and it all runs on the binary code. But, it is surprising how little many of us understand about the code that influences so much of our lives. For Teen Tech Week in March 2017, I wanted to do a program for tweens on coding and showing them the binary system. But, is binary code easy enough for kids to understand and write? Can we do a coding program without a computer? As we found out, the answers are yes, and yes!

Read more

Kids’ STEM Workshop: Marble Maze (Push and Pull Physics!)

Put kids and marbles together and you automatically have a great time planned. Add a few lessons about Push and Pull, and you have an experiment in physics that combines fine motor skills, creative design, an understanding of force, and lots of marbles that went home with happy families. We held this program as a our second Workshop in January of 2017.

The skinny: This was a super fun program, although it was one of our shortest ones yet. I talked with the kids for about 15 minutes giving them some background in forces, balance, and push and pull physics. Then, I turned the kids loose on building their own marble runs. It only took the kids 15 minutes to design their own, which was much less time than I expected. In the future, I will try to combine this with a second activity to stretch it out, because I do like these workshops to go for 45-60 minutes. It was budget friendly, with supplies left over for me to do this again during our summer reading program.

Inspiration: I found this idea on Buggy and Buddy Blog. Her photos were so engaging that I thought, “We can try that!”

Cost: About $0.25 per child. I ordered a large box of Wikki Stix from Amazon for $23 (this box should serve 156 children, so we will certainly be doing this project again to go through it all!). I also ordered a large bag of Soak-Proof Foam Dinner plates ($4) so that the kids would have something sturdy to build on, and these plates had high edges. I also purchased three packs of 50 marbles for $1 at the Dollar Tree. We also used tape and scraps of construction paper that we had on hand. Each child received one plate, one marble, three of the Wikki Stix, and free access to the paper, markers, scissors, and tape.

Materials:
Foam Plates
Scissors
Scrap construction paper
Wikki Stix
Tape
Markers
Marbles

STEM at work: Building a marble run on a paper plate, which is meant to be held and moved back and forth to make the marble go on the desired path gives children an opportunity to experiment with physics principals, Newton’s First Law, the force of gravity, and creative engineering through original designs. To keep it focused, I decided to talk about the forces of Push and Pull.

Set up: To keep the kids on track (and not using more supplies than they needed) I took the time to prepare individual bags and place settings for each child. That way we did not have to fight about which color or Wikki Stix each child wanted. In each bag I placed 3 of the Wikki Stix, all in different colors and 1 marble. I set up the tables so that each table had five plates with the prepared bags, and I also pre-cut a piece of blue painter’s tape about 8 inches long and stuck it to the table. That way, each child has the materials they needed. I also pre-cut about 200 strips of paper approximately 1″ by 4″ to use for building arches and guards for their marbles. The paper strips were placed on the tables in pie tins so that the kids could grab them and use them at will.

Resources: I used the book, Give it a Push! Give it a Pull! A Look at Forces by Jennifer Boothroyd.

How it went: I brought all the kids and families into our Storytime/Programming Room. The kids sat on our magic carpet and I started off by placing a toy bus on the table. I asked the kids what the bus was doing. (Correct answer: nothing!) I then gave the bus a push. Now what is it doing? (Moving!) Why? One girl answered, “Because of the wheels!”) Really? I turned the bus on its side and gave it another push which sent it a few feet away. We got to the part that it was moving because I pushed it. I then pulled the bus over to me, and the kids go that it moved because I pulled it. Push=move something away from the force. Pull=moves something closer to the force.

I then took out our book,  Give it a Push! Give it a Pull! A Look at Forces by Jennifer Boothroyd. I try to use a book at least for a few moments every Workshop because it shows that literacy and STEM go together in fostering curiosity! I did not read every page of this book. Instead, I prepared some post-it notes and I placed them on pages where I wanted to ask the kids questions. This helped keep the book engaging, and kids and me asking questions about what we were reading.

After finishing the book, I showed the kids the marble run that I had created, and how they would be tilting the plate to push and pull and marble towards them, or away from them, for the marble to go through its maze. I had the kids count and time me to see how long it would take me for my marble to go through the maze that I had created. (Answer: 6 seconds!)

I then had kids volunteer to bring the tables out from the corner of the room and into the center. One little girl was frustrated with her partners who were not lifting the table and she said, “Why is this table not moving?” I could not help it, and I had to answer as I went to give them a hand, “Because we are not applying enough force”. J I have found out that kids love to help me set up and take down the programming room after a program, and this is an important time for me to build positive relationships with them by thanking them for helping.

With the tables in place, the kids were ready to build! Like I said above, it only took them about 15 mintues to finished their maze. Then, the kids raced each other to see who could make their marble go through the maze fastest. I am getting smarter at this, and after the program I asked the kids to give me back and sandwich bag that held their marble and three Wikki Stix. I can re-use the bag, which cuts down on waste and cost! Some kids wanted to keep their bag, though, so their marble did not get lost on the way home, which was fine.

Another STEM Workshop in the books! Stay tuned for our February Workshops: Human Heart Science and Write Your Name in Computer Code!


Kids’ STEM Workshop: Bats in Flight!

Who loves bats? You know, those amazing mammals that fly, eat mosquitoes and harmful insects to farmer’s crops, and represent good luck when seen in China? How do those bats fly and swoop in the air, so much more agile than birds? Better yet, can we make a simulation of a bat that also swoops like the real thing? You bet we can, in Kids’ STEM Workshops!

The skinny: This program totally came from an area science teacher. I asked her if she had ideas for October themed programs, and she came in and gave me the template to make this project. Although there is lots of folklore and fears associated with bats, they are an important part of our natural diversity with important jobs to do. They also are mammals that fly, and their unique wing design allows them to swoop and dive mid-air, something that birds simply cannot do. Our activity made a model of a bat with a challenge: can you make this paper bat swoop and fly like a real bat? Best yet, this program cost us $0 to offer and it filled our library with swooping bats and a lesson about flight!

Read more

Kids’ STEM Workshop: Straw Towers!

“Who have guessed that a box of straws could be so entertaining?” one of my parents at our Kids’ STEM Workshop: Straw Towers remarked to me after watching her children totally engrossed for 45 minutes with their creations. And, what a great way to get kids to use their fine motor skills working with materials that are not usually used together! The challenge: build the largest tower you can with straws and paper clips. Or, build another structure and go for the most creative, or, the most similar to a famous tower or building. Go!

The skinny: The night when we offered this program it was incredibly cold, rainy, and otherwise not “go out to the library” weather. I honesty thought we would have no one come, but a nice crowd showed up despite the conditions, and our Children’s library was alive!

Read more

Kids’ STEM Workshops: Marshmallow Igloos!

With snow on the ground and Wisconsin suffering from a cold snap, it was the perfect night to talk about how Inuit people build houses with nothing by the natural materials their environment gives them: snow and ice. And, what better way to learn about it than by experimenting with geometric shapes to build igloos of our own…in the comfort of the heated library with marshmallows and toothpicks as our building materials of choice!

The skinny: This was a wonderful winter themed STEM program, and it brought in working with 3-D geometric shapes, which is a program that I had not done before. We had many families attend, which was surprising since they it was January and many families were still out of their normal routine with December not so far in the past. But come they did!

Read more

Kids’ STEM Workshops: Bridge Engineering!

This was the first Kids’ STEM Workshop we offered. We had a great attendance, and it was a wonderful way to kick off our series and let parents and kids know we would be doing this twice a month by offering an incredibly low cost program. And, what kid does not want to build the tallest tower in the room?

The skinny: This was a wonderful program, and it cost us $0 to offer it. The kids and parents enjoyed working together on something incredibly simple: build a tower out of nothing but newspaper and yarn that can hold the most weight possible.

Read more

Kids’ STEM Workshop: Toilet Paper Mummies!

Our last STEM night was very close to Halloween. What else but wrap ourselves up in toilet paper and practice some math skills at the same time?

The skinny: This was a very successful program, and it was the first program that I saw parents actively pulling their phones out to take pictures of their kids all wrapped up in toilet paper. When parents are taking pictures, you know you are on to something good. Also, this was a program that used the “Math” part of STEM, which is something that can be tricky to have good programs for.

Read more